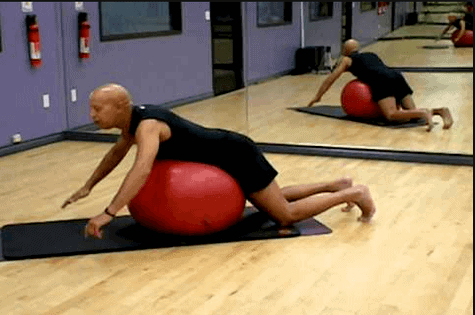
Stability ball exercises for beginners’ articles have become imperative because of the difficulty in trying to exercise with it, especially for a beginner. The ball’s unstable surface could make a beginner use it the wrong way or should I say apply the muscles of the body differently to maintain balance.
The stability ball exercises help to build and strengthen the core.
You should also have it in the back of your mind that stability ball exercises are not all about strength, not strength exercises or speed but control. I love that, ‘’control’’! So, control is all you need here to gain mastery of stability ball exercises.
Make sure you also clear the area you intend to use for these exercises to avoid injury, things like furniture, and piercing objects. You can do these exercises without having to count the number of sets and repetitions but exercise until you have had the feel of it that you can no longer hold the correct position. When you start feeling your back sagging, pelvis tilting, and arching then, you have reached your technical failure which means it is time to stop to rest for a couple of minutes to resume again.
So, because this article is about stability ball exercises for beginners, I wish to start with the basics, then in my next article will proceed to the advanced ones. Before we proceed there is the need to point out how to sit on the exercise ball and also make sure you select the right size you are comfortable with.
Table of Contents
How to Sit on Stability ball exercise ball
Learning how to sit correctly on a stability ball would add to getting results and also eliminates injury. Sit on a stability ball with your shoulder blades down and chest up, even as your head is back over your shoulders. Your feet should be flat on the ground/floor about shoulder-width wide or thereabouts.
• Do not let your head tilt to one side but let it be straight
• Do not let your shoulders be uneven, but level.
• Do not let one of your hips be higher or lower than the other but let both be even
• Let your kneecaps be even
• Do not let your ankles roll in so that your weight is on the inside of your feet but let them be straight so that your weight will be on the feet and not on the inside.
It is OK to feel as if the stability ball is rolling under you when you first start using and sitting on it. In a situation like this, you can start by sitting with your feet on the floor/ground shoulder-width apart and your hands on the ball.
By the time you have been reassured that it is not rolling away, you can now put your hands on your lap and bring your feet a bit closer together. If you have gotten used to sitting on the stability ball this way with a good posture as stipulated before then you are ripe to try the pelvic movements.
Pelvic Tilt
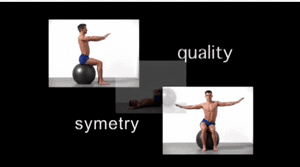
This is all about trying to move your pelvis separate from your lower back. So, start by getting seated on the exercise ball with the correct and proper way of sitting just as I have mentioned earlier. As in your shoulder blades should be down and back, chest up, and keep your both feet on the ground flat shoulder-width apart. Keep your lower back flat by sliding your hips forward on the ball. As you now tilt your pelvis the ball should move forward a little bit. The prime mover is the lower trunk musculature.
Pelvic Literal Shift
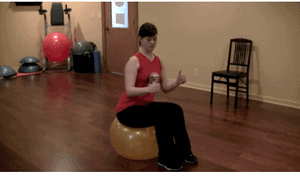
Apply all the sitting conditions by sitting on a stability ball with your chest up, shoulder blades down, and back, with your head back over your shoulders. Keep your feet flat on the ground/floor shoulder-width apart. Make sure your head is always over your shoulders and your shoulders are not bent but level.
You can start by moving or sliding your hip to the right side even as the stability ball slightly moves to the right. Do the reverse as you slide your hip to the left. Always maintain a good posture while doing this. The prime movers are the lower trunk muscles, glutes, and obliques.
Supine Bridge
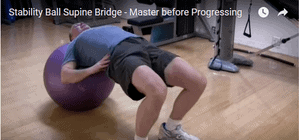
This is done by sitting on the stability ball with the chest up, shoulder blades down, and back, while your head back over your shoulders. Do keep your feet flat as always on the ground/floor at shoulder-width apart.
At this point place your hands on the ball beside you and walk your feet forward while you lean back on the stability ball. Continue walking forward until your head and upper thoracic spine rest on the ball and push your heels so that your hips are raised to the point that your lap, upper body, and head become straight. Start lowering your hip and butts down and up again.
Return to a seated position again by tucking in your chin toward your chest and contracting your abdominal muscles and then walk your feet back toward the stability ball. Ensure that your spine is in line with your neck and do not walk out so far to the point that your head and neck are the only support. The prime movers are the glutes, quadriceps, and lower back extensors.
Stability Ball Bridge
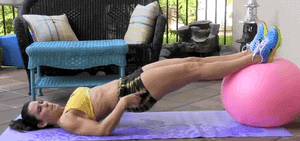
Performing the stability ball bridge requires you to start by lying on the floor with your head, shoulders, and back on the floor with your heels on the ball. Your arms should be straight out beside you with downturned hands (hands facing the floor).
Slowly raise your hip and butt until the body is straight from the shoulders to the heels in descending/ascending order and lower again and repeat. Prevent your back from arching by not pushing your hips too high and also avoid moving your head during this exercise. If you start feeling fatigued or shaking your exercise is done. The prime movers are the hamstrings, back extensors, and the glutes.
<<<Leg Exercises for Beginners>>>
Conclusion
I would advise that before you engage in any of these exercises you should consult your physician. These are simple and basic ways to perform the stability ball exercises for beginners. I do hope you found this helpful and if you do, please do share because sharing is caring.
I hope to see your questions, comments, or just contributions in the comment box below.
I am a health and fitness enthusiast. I take anything and everything that improves my health seriously. Hence, I try to share my knowledge in helping people that wish to up their health status to one that enables them to live strong with confidence.
We also review health and fitness equipment such as treadmills, elliptical trainers, spin bikes. recumbent bikes and many more.
